

Tutorial time! What do you think about a tutorial every month? I actually kind of like doing these pictorial tutorials. Let me know if you like them too! As requested by a friend, I have a half moon manicure to share today! I think there are tons of half moon manicure tutorials, but this is mine. I think with this one patience is the key. These are the polishes I used:

Left to right: Orly Bonder, Color Club Antiquated, OPI Can't Find My Czechbook, Seche Vite Top Coat.


1. Make sure you start with a good base coat. Here I used Orly Bonder. I usually use OPI Nail Envy, but I wanted to try Bonder out. It creates a rubberized base coat and makes the polish adhere to the nail better. After that, add a base color of your choice. I like to use metallic colors.
2. Here is where patience is a virtue. Make sure your first layer of polish is dry! Add a reinforcement sticker as a guide. These are so cheap and easy to find. I got mine at the Dollar Store. You can use any kind of sticker with a rounded edge.
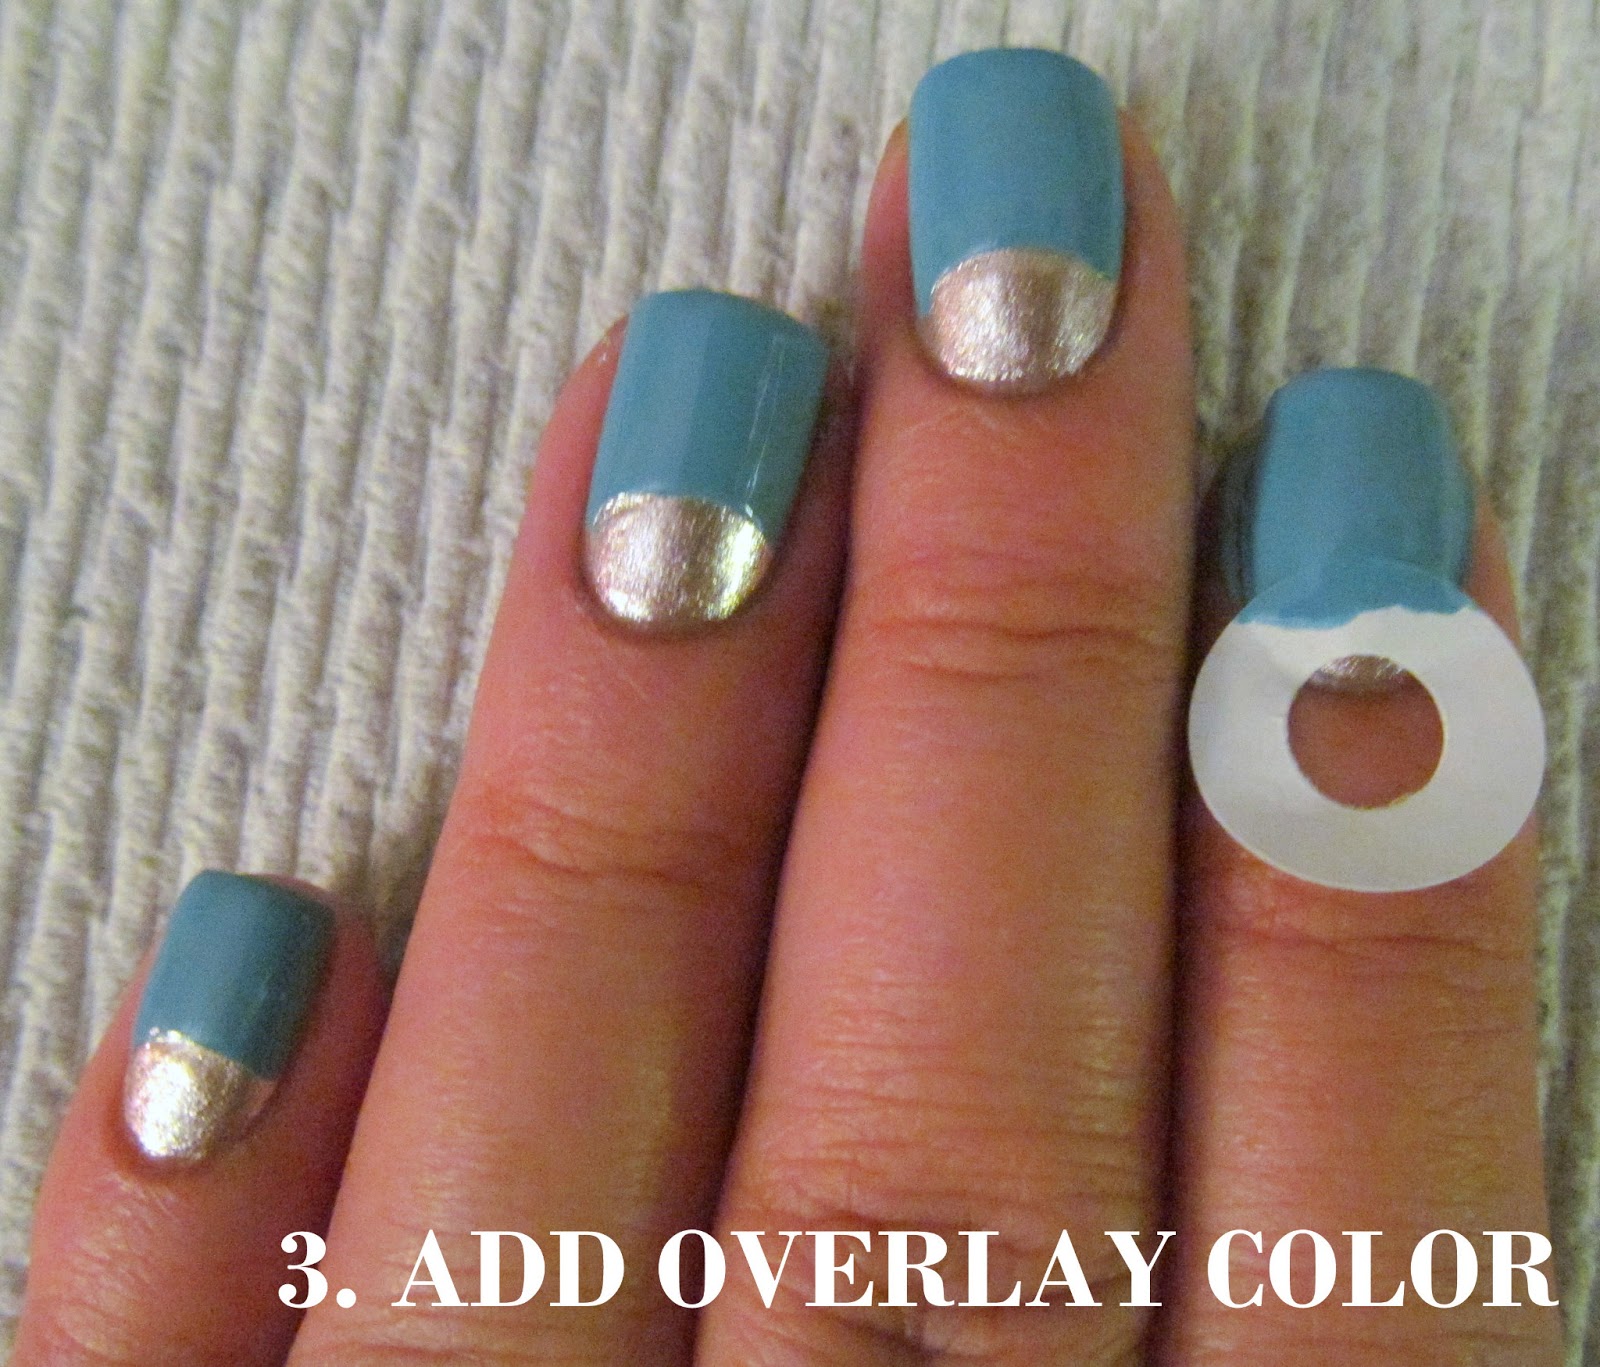
3. Apply your overlay color. You can choose any color you like!
4. Very carefully peel off the sticker. You want to make sure it doesn't lift the first layer of polish. Add a top coat and you're done!
Here are some photos outdoors in direct sunlight:


No comments:
Post a Comment